Popular Posts

7/30/2012

Week(s) in Pictures!

These are some photos from up to a few weeks ago! I didn't have enough pictures for one week so I thought I'd combine them into one big blog post. Enjoy!

The best burger I have ever had.
Beautiful sunset :]
My organizational skills at American Eagle.
Deep fried California rolls.... so good.
Dragon rolls. Again - amazing.
Strawberry bloom donut from Tim's :)
Music, music and more music.

That's it that's all! I really don't take many pictures, but I hope these were enough. If you have a week in pictures blog post, be sure to link it in the comments so I can see!

7/29/2012

Project Pan Take Two - Update!

So these are some products I have used up recently! Not all of these are from my project pan - some are just ones I've finished, but I thought I'd include them as well.

1.) Benefit's high beam (sample)
I honestly don't really like this product and definitely won't purchase the full size. It's pricey, and despite the fact that it comes with a lot of product I find it to look too fake and glittery on my cheeks.


2.) Benefit Stay Don't Stray eye primer (sample)
I actually quite liked this. I'm having a bit of a problem now because I thought I had a back up UDPP after this and it turns out I lost this, so I'm out of an eye primer. I'm not sure if I will repurchase this or not just yet, but it is a perfectly fine product.


3.) Benefit Ooh la lift eye brightener (sample)
To be honest, I quite liked this product, but I won't repurchase it. I think it is a little unnecessary and I'd rather just have a good under-eye concealer.


4.) Maybelline Instant Age Rewind Eraser for Dark Circles
You all know how I feel about this - it was in my products I regret buying post. I won't be repurchasing this - I'm actually planning on buying the Garnier Anti Dark Circle Roller instead.


5.) Maybelline Great Lash mascara
I liked this, but it was nothing special. I purchased it because it was cheap and on sale and I like trying out different mascaras so much that I probably won't buy it again.


6.) Tresemme Heat Tamer Spray
A lot of people love this and I do too. The scent is amazing and it's very cheap as a heat protectant. I probably will repurchase this just because I feel guilty not using a heat protectant ;)


7.) Vaseline Cocoa Butter Deep Conditioning Body Lotion
I looooveeeee this. It smells amazing and it is super moisturizing, in addition to being incredibly inexpensive. However, I recently rediscovered my Body Shop body butters and am loving those more than life itself, so I probably won't repurchase this.


8.) Laura Mercier Tinted Moisturizer
Again, you all know how I feel about this. I won't be shelling out all the money to purchase this again.


And some updates on other products I'm trying to finish:

-Maybelline Fit Me powder 


-Benefit Dandelion boxed powder (sample)


-Covergirl Shimmering Sands trio


-Clinique All About Eyes cream


So that's it! I hope you all enjoyed this blog post. What products have you used up lately?

7/19/2012

How to - My Steps to the Perfect Pedicure!

I've had this blog post in the works for quite a while because I haven't gotten around to finishing it, so finally, here are my tips to really pampering your feet!

1.) Take off any nail polish! I've been trying out butter London's Powder Room nail polish remover and am thinking about doing a review on it. Use whatever nail polish remover you prefer!


2.) Moisturize. Give your feet some TLC - I like to use Principessa beauty's Pretty Piede foot balm and massage the arches of my feet really well. Not only is it relaxing, but it feels great and makes your feet and hands smell lovely.


3.) Cuticle oil. This is an extra step I like to take for a little bit more moisture. This is the Q.Tickles Scented Botanical Cuticle Oil in the rose scent. You can see the bottle actually contains rose petals - part of what makes it feel so luxurious.

4.) Anything else you might want to do before polish - filing, clipping, anything. I would do that sort of grooming now.

5.) Start with a separator. I know these look and feel pretty stupid, but toe separators are actually very useful. If you find you have a hard time getting every toenail properly painted, this is a tool that will make everything a whole lot easier.


6.) Base coat. I always use a base coat to protect my nails from yellowing, and this one (Sally Hansen's Insta-Brite) is great because not only is it a base coat, but it actually is supposed to whiten the nails as well.


7.) Polish. I like to pick a nice natural colour that doesn't attract a lot of attention, because then I don't have to take it off as early on. (I'm not sure if that makes sense.... but if you have a bright neon pink on your nails and it chips, it's going to be more noticeable than a nude). I used butter London's Yummy Mummy, a nude with subtle shimmer.


So that's it! What is your top tip for tip top toenails? ;)

7/18/2012

Collective Haul!

I've been doing these haul posts a lot lately but I got a few more things over the last month that I'm really excited about, so I thought I'd share them with you!

Starting off with jewelry, I got this long silver locket from Forever 21 for $6.80, I believe. I love how it actually opens, and I am a big fan of long, pendant-style necklaces so this was a good buy for me.

I also got this large owl necklace from Claire's, and it was around $14. It has a gold chain and black and white detailing on the body.


Lastly, I purchased this bracelet from a small boutique near where I work. I saw it and realized it seemed to be quite similar to the bracelets available from Bauble Bar, and for the $18 price tag, I thought it was a pretty good deal. I love how it is rose gold, as well.


Moving into beauty, I picked up this mini sized body mist from Victoria's Secret. I love this scent in the perfume version but couldn't justify paying $50 on it, so I just bought the $10 body mist. This is an amazing fruity scent that reminds me a lot of Someday by Justin Bieber (I just like the perfume. I promise!).


I also got a new deodorant. (you probably didn't need to know that, but oh well.)


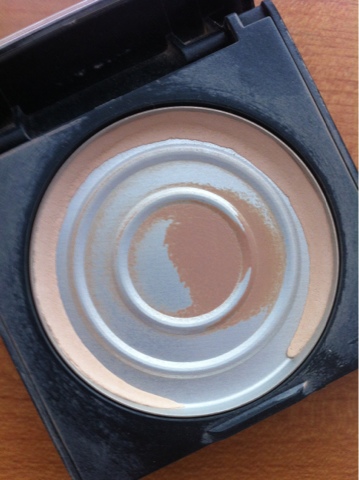
And lastly, I got this lipgloss from butter London in Trout Pout. Now before you realize I'm on Project Pan and think I cheated, I actually got this for free using my Glymm box points. Therefore, I'm telling myself it doesn't count.

This is a beautiful peachy-pink colour. I'm thinking about doing a review on this in a separate blog post.


Moving on into accessories, I first got this scarf from American Eagle. I work there, so I did get it at a discount. It's a loop scarf with a small floral print across it, and I love the colour scheme. 

I also got this bag at Aldo Accessories. I have very few purses (this is actually my second) and I've been wanting a cross-body bag for quite a long time. I saw this one and I love the floral print on it, as well as the colour of the "leather". Best of all, it was only $35.


I purchased one pair of shoes, and they are these boots from Spring. I think they're gorgeous, with the cut-outs and the way that they were made. Initially, I believe these were $70-80. They were then marked down to $50, and somehow I got them for $35. 


I'm also going to quickly run through some clothes that I purchased from American Eagle. I first got this shirt online (that's why it is so wrinkled) and I had been wanting it for a very long time. I love the open-knit style of this henley tee and it's totally my style. 

I also got these pants online, and I believe they are called the Skinny Trouser. I got them in a khaki colour so I could wear them to work at Starbucks :) 

(On a side note, I'm 5'11 and was itching to try the x-long length, so I did. It turns out they're too long for me and once I got over the shock of having pants that were TOO LONG, I realized I'd have to cuff them or hem them. Oops.)


In the store, there was a deal going on for certain employees to get a pair of jeans for $10, so I got this pair. I had been needing new denim since I have holes wearing through in some of my older ones, so these were a good buy.


Lastly for clothing, I got this denim shirt. Just like everything else, I'd wanted this for a while and decided to finally get it (with my discount). I have one in a darker colour but I like the lighter one a little bit more, I think.


As for one random thing, I got my markout from Starbucks for last week (which is a free item, basically.) I chose to get a box of the Orange Blossom Tazo tea, and I quite like it, actually.


That's my looooong haul! Thanks for sticking through to the very end and make sure to follow my blog if you enjoyed!

7/14/2012

How to - How I Press Pigments!

This is going to be a quick and easy step-by-step tutorial for how I like to press my pigments! If you have any other questions, feel free to leave them in the comments.

You will need:

Your pigment (I used this one from L'oreal called "Bare Shell", but pigments are available everywhere. In addition, if you accidentally break an eyeshadow, you can smash it up into a pigment and use these steps to re-press it!)


Rubbing alcohol (If you don't have this, you can also use a toner where the main ingredient is alcohol. Before I bought this bottle, I used my Clinique toner!)


A small container to mix in (I used the lid from the pigment)


An empty eyeshadow pan


A paper towel and something to mix with (I like to use the handle of a small brush.)


A large book and a quarter, not pictured.

Instructions:
1.) Pour some of your pigment into the container. I like to add in small increments and mix as I go to see how much I need. I actually ended up using the whole container of pigment this round!


2.) Using the cap of the alcohol to measure it out, add enough so that you have a paste consistency. You want to be able to pour this into the eyeshadow pan, so make sure it isn't too dry. You can always add more alcohol or pigment if necessary, but if you add too much alcohol it merely means the eyeshadow will take longer to dry!

3.) Mix well.

4.) Pour the mixture into the eyeshadow pan. To ensure it is evenly spread out and flat, I lift it about a centimeter and drop it a few times. (It seems violent, but it won't spill, don't worry!)


5.) Let it sit for an hour or so until it is fairly dry.

6.) Cover with the paper towel. Add a quarter onto the paper towel over the pan to press it down, and put the heavy book on top. Let sit for a few hours.


7.) Place in a safe place or a palette and enjoy!

Before it was pressed
And after (it was much later at night, which explains the completely different lighting!)